This page is for macOS. For Windows, read Windows Permissions. For Linux, read Install HyperWhisper on Linux, which covers the
hyperwhisper-input group for global shortcuts and automatic paste, and the optional GNOME and KDE companions for active-application matching.Permissions at a glance
Microphone
All transcription requires the Microphone permission. At your first recording, macOS shows the standard system dialog:“HyperWhisper” would like to access the microphone.Click OK. If you click Don’t Allow by accident, open System Settings → Privacy & Security → Microphone. Then turn on HyperWhisper. Without it: Recording fails immediately. The app shows an error banner that tells you how to grant access.
Accessibility
Two features require the Accessibility permission:- Auto-paste — HyperWhisper sends the paste keystroke to the frontmost app for you.
- Bare-modifier push-to-talk — HyperWhisper detects hold-to-record on one modifier key (Fn, Option, or Control) in all apps. This includes the Fn+Control and Fn+Option combination modes. Fn is the default. Standard hotkey combinations such as
⌥Spacework without the Accessibility permission.
1
Open System Settings
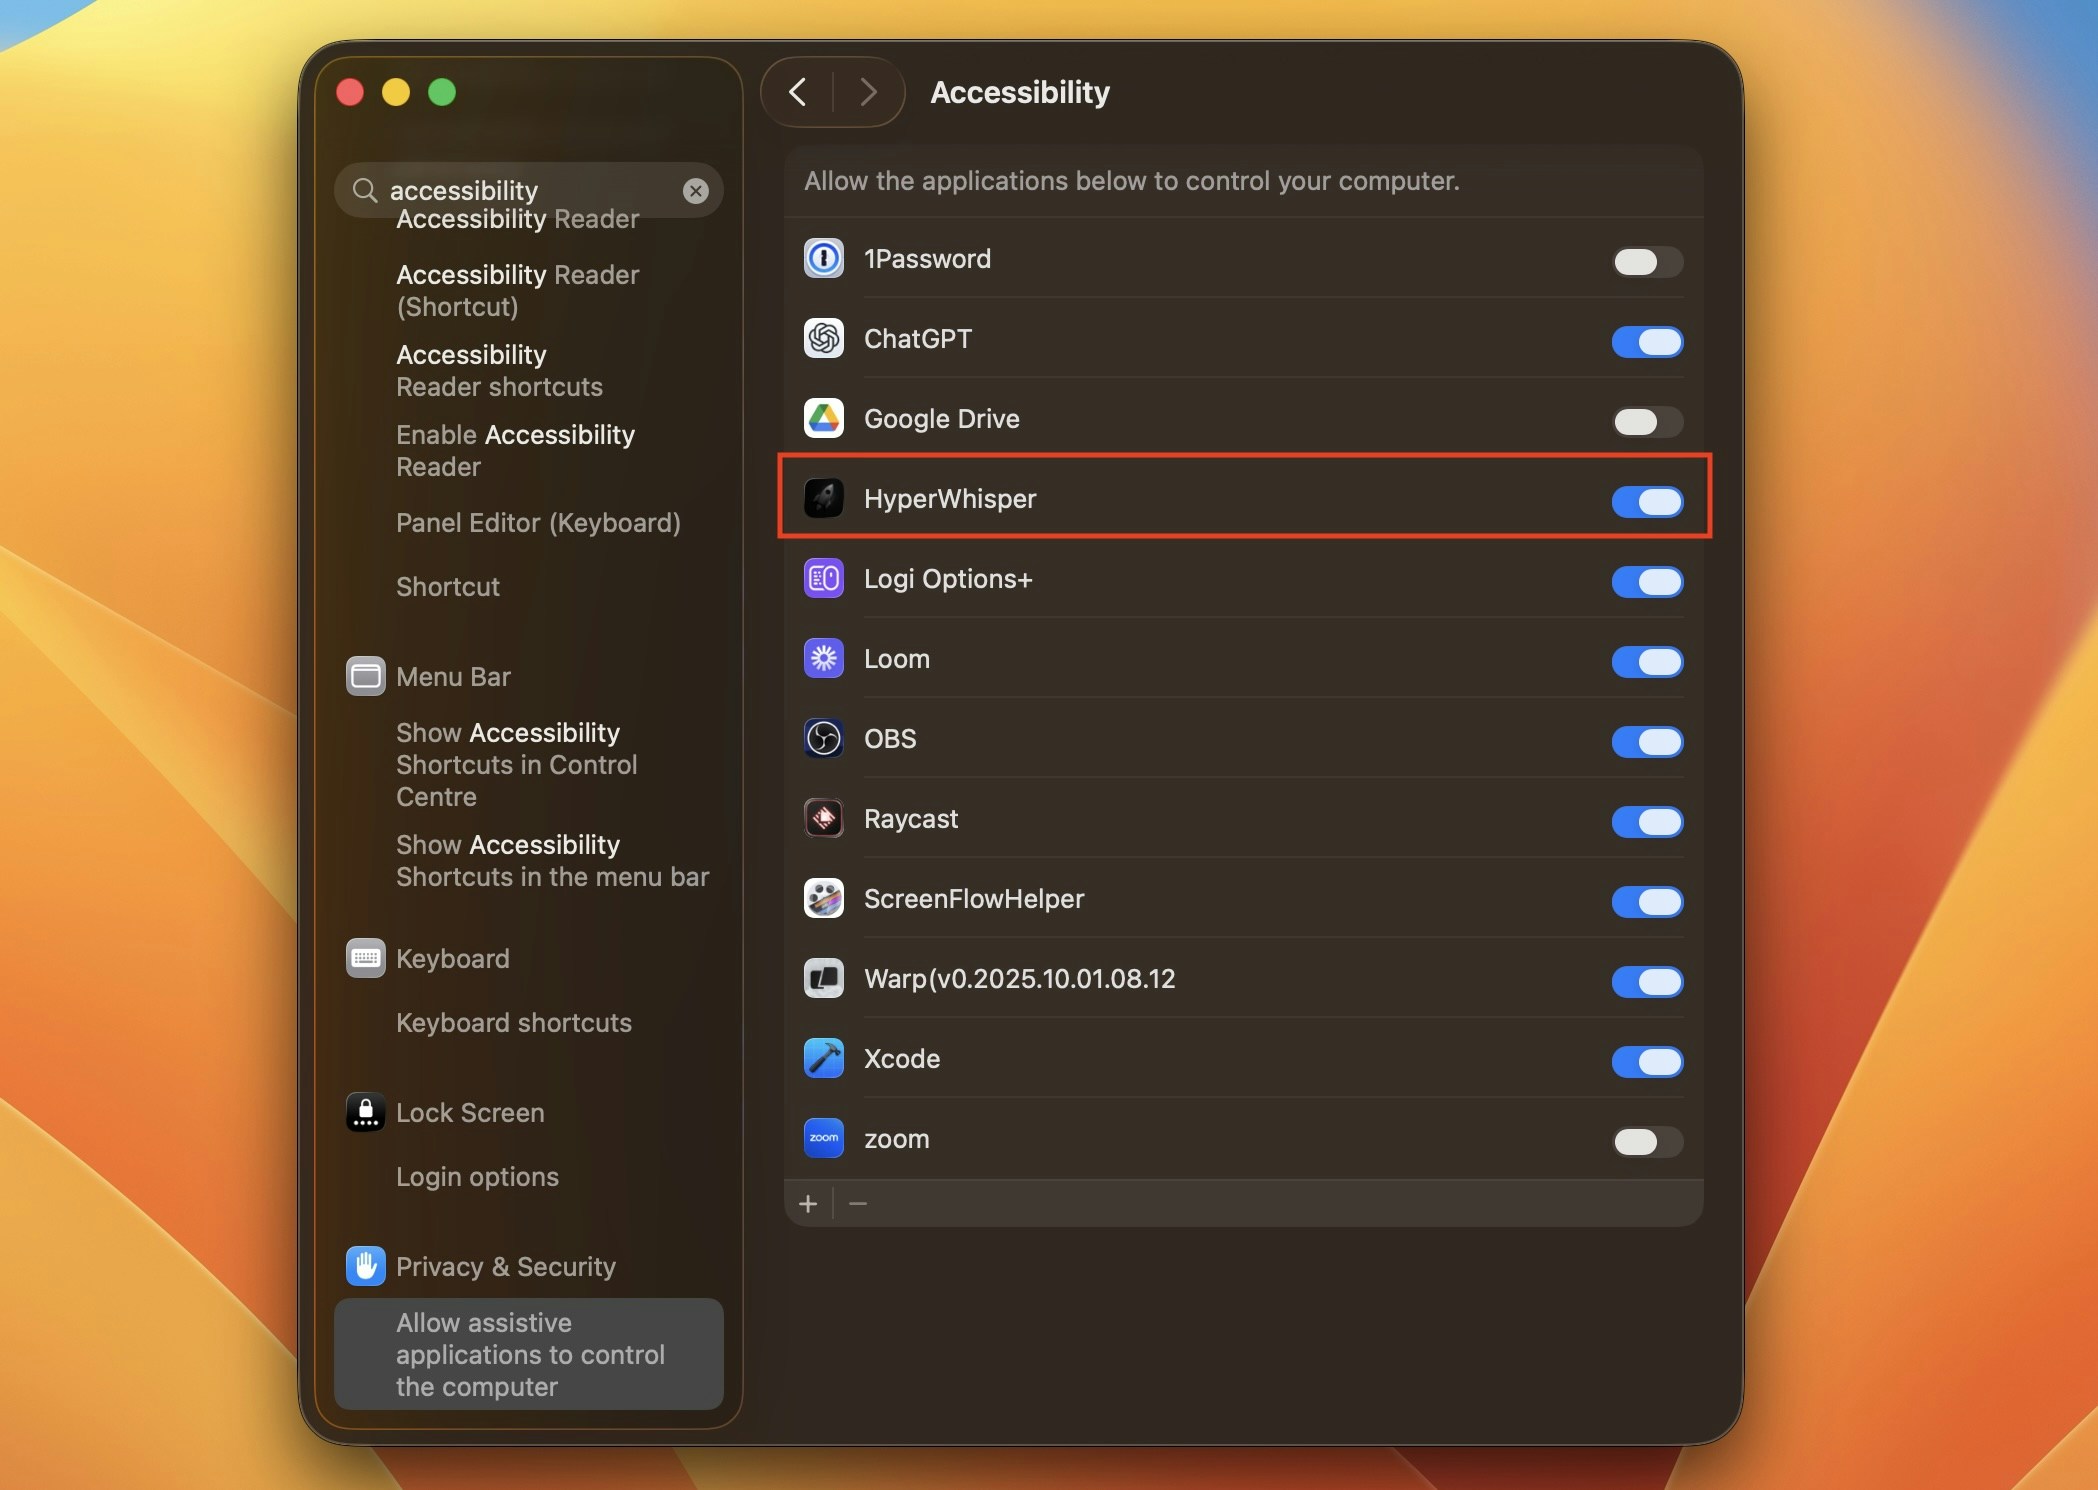
Choose System Settings → Privacy & Security → Accessibility.
2
Unlock and add HyperWhisper
Click the lock icon and authenticate. Then turn on HyperWhisper in the list.
3
Go back to HyperWhisper
The new permission takes effect while the app runs. You do not need to start the app again. Auto-paste examines the permission at each use, so it works at your next transcription. Bare-modifier push-to-talk starts as soon as the app finds the grant.
HyperWhisper watches for the Accessibility grant for 10 minutes after it finds the permission missing. If you take more than 10 minutes to grant it, select the push-to-talk mode again in Settings → Shortcuts, or start the app again.
Screen Recording
Optional — only Screen Text mode requires this permission. This mode reads the text on the screen into your transcript context. If you do not use this mode, you do not need this permission. If you turn on Screen Text mode, macOS prompts you at the first screen capture. Grant the permission at System Settings → Privacy & Security → Screen Recording. Then start HyperWhisper again. Without it: Screen Text mode fails and shows no error. Other modes continue to work.Automation (Apple Events)
HyperWhisper uses this permission to send your transcribed text to apps such as Notes (Quick Capture). macOS prompts you when HyperWhisper first controls one of these apps. Grant the permission at System Settings → Privacy & Security → Automation. Without it: Quick Capture to Notes does not work. Other transcription features continue to work.HyperWhisper mutes the system audio during recording (see Media Control). It uses the direct system audio APIs, not Apple Events automation. This function does not require the Automation permission.
Speech Recognition
The Apple Speech Analyzer local transcription engine uses this permission (macOS 26+). macOS prompts you at your first transcription with that model. Grant the permission at System Settings → Privacy & Security → Speech Recognition. Without it: Transcriptions with Apple Speech Analyzer fail. Other local models and cloud models continue to work.Input Monitoring
Not required. HyperWhisper uses the standard global hotkey API of macOS. It also uses the Accessibility API for advanced push-to-talk. These two APIs do not need Input Monitoring. If macOS or another tool prompts you to grant Input Monitoring to HyperWhisper, you can refuse.Reset the permissions
If the permissions stop working, or if you granted them to an old build, run these commands:If you run a development version, replace
com.hyperwhisper.hyperwhisper with the bundle ID of your build.